How to Create a Pick Ticket
Prior to this process, you should have created a Sales Order. If you have not done so, click the button to learn the steps for Entering a Sales Order:
Once you have a sales order in the system, proceed to follow the steps below to Create a Pick Ticket.
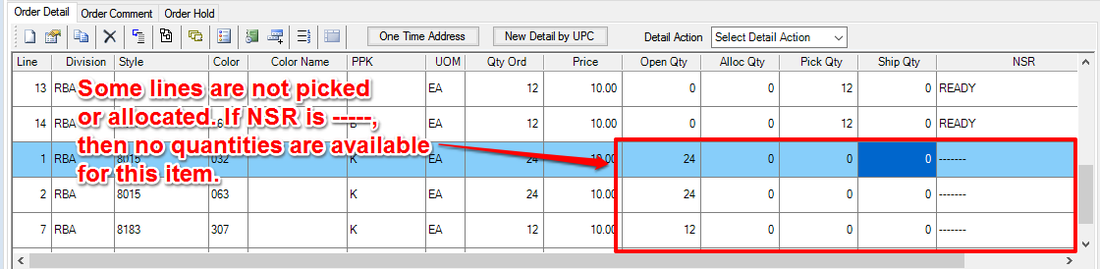
Check for Ready Order Line Items
Start by opening Sales Order Management > Order Maintenance, if you have not already done so.
After entering an order, Simparel will automatically allocate quantities to those line items with available quantity.
If the allocation is successful, you will see READY in the NSR column in the Order Details section.
After entering an order, Simparel will automatically allocate quantities to those line items with available quantity.
If the allocation is successful, you will see READY in the NSR column in the Order Details section.

Not all line items may be READY. If you see an NSR code of -----, that means there is no available quantity for this item anywhere. That means none in inventory and none in production.
Generate Pick Ticket
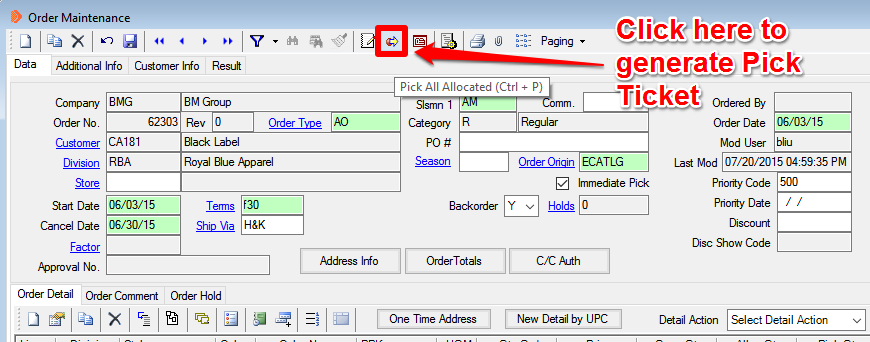
Click on Pick Allocated at the top of the window.
The Sales Order Mass Pick Alloc window will open.
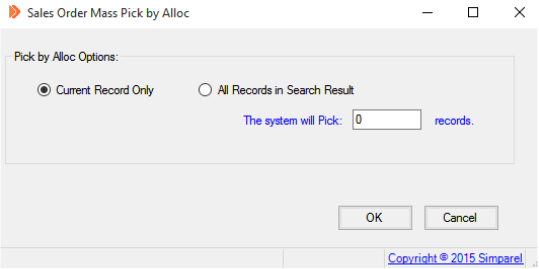
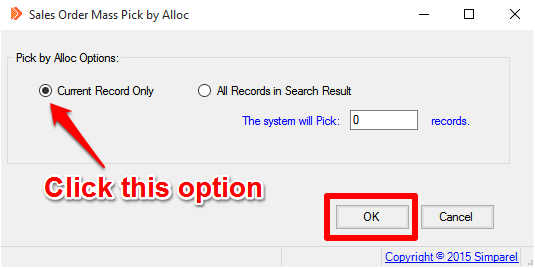
If you want to generate a PT for this sales order only, then click Current Record Only and then click OK.
If you want to generate PTs for multiple orders, then click Cancel to go back to the Order Maintenance window.
Click on the Find button at the top.
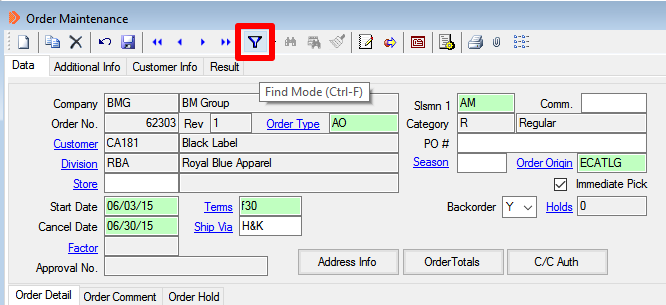
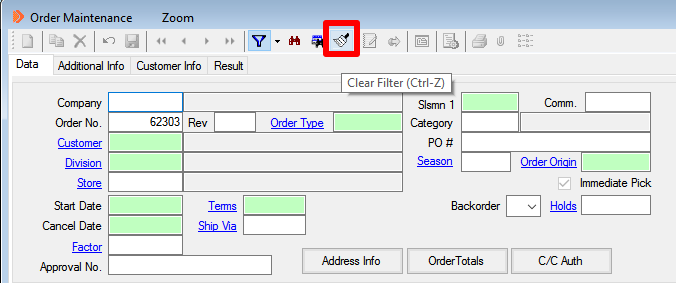
Click on the Clear Filter button to clear all previous search terms.
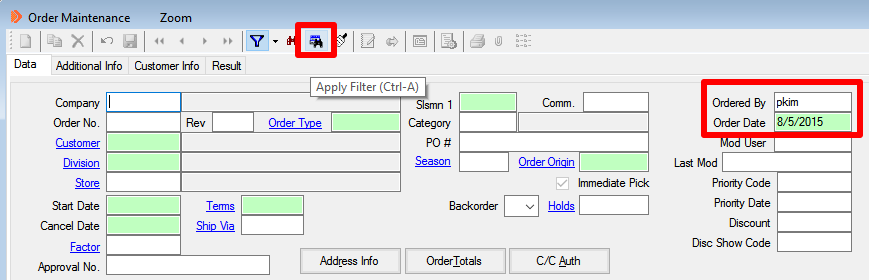
Type in the search criteria you want. You can type multiple.
For example, we can search by the person who entered the order and the order date.
After you type in the search terms, click Apply Filter at the top.
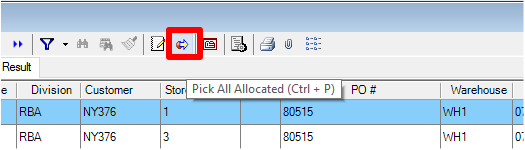
If there are records that meet the criteria, they will appear in another window.

Click Pick All Allocated at the top.
Select All Records in Search Results.
Click OK.
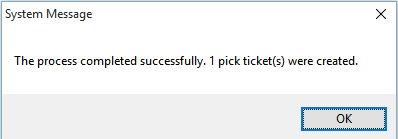
A system message window will appear showing how many pick tickets were successfully generated.
In this example, only one of the orders had available quantities to be picked. Therefore, only 1 pick ticket is created.
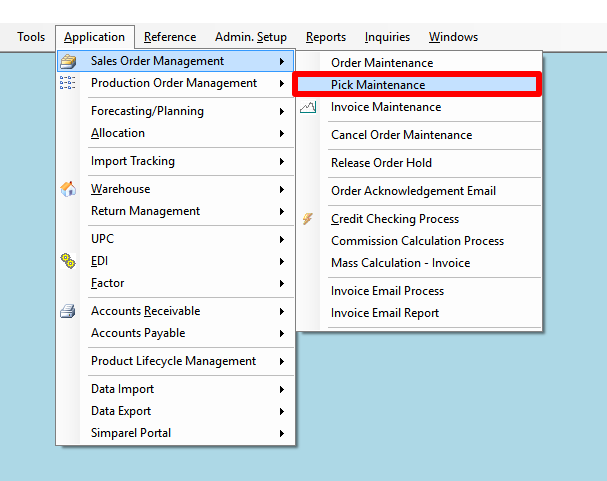
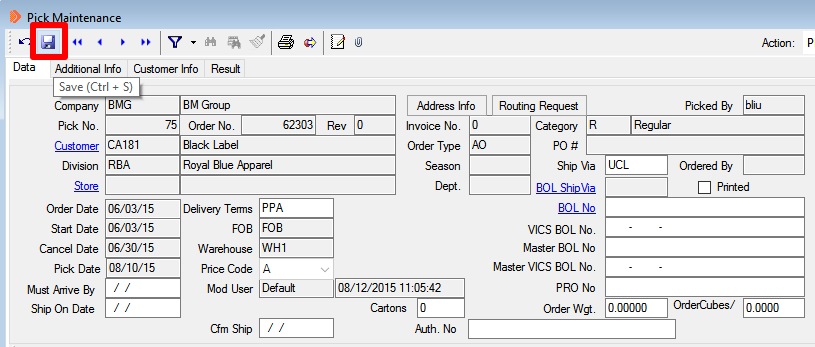
Open Pick Ticket Maintenance
After creating the pick tickets, we may have to change certain details about the order.
To do so, open Pick Maintenance.
To do so, open Pick Maintenance.
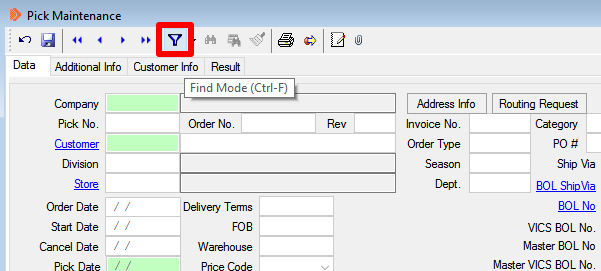
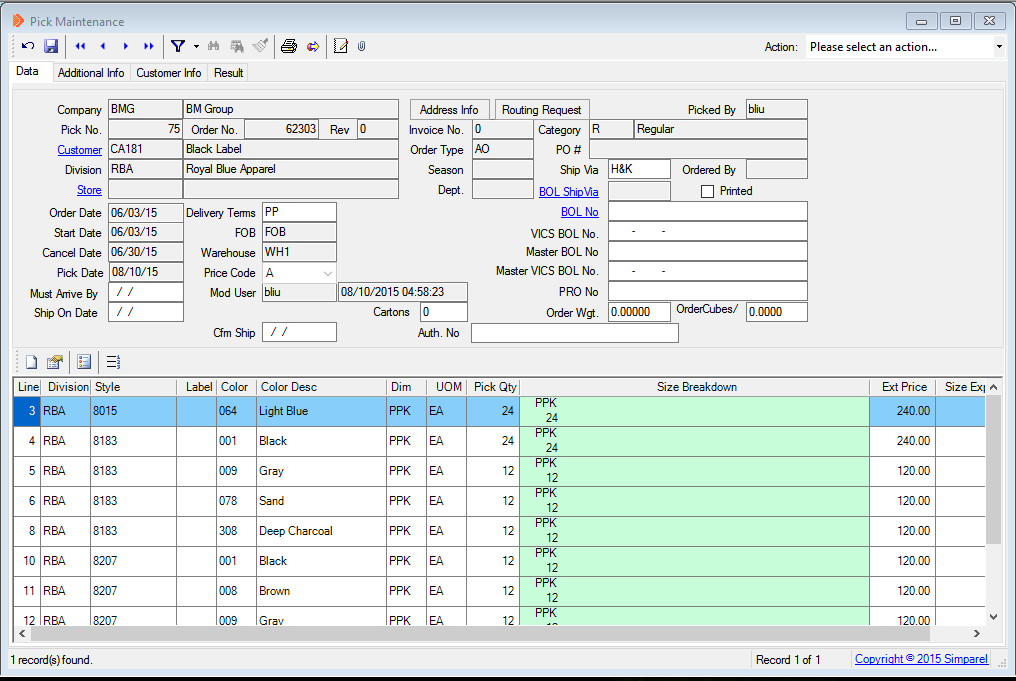
Find the Pick Ticket Record
Now we will find the Pick Ticket for the Sales Order.
Click on the Find Mode button at the top.
Now we will find the Pick Ticket for the Sales Order.
Click on the Find Mode button at the top.
Type in the Pick Number if you know it, or the order number for which the pick ticket was generated.
You can type in both too.
Click Apply Filter at the top of the window.
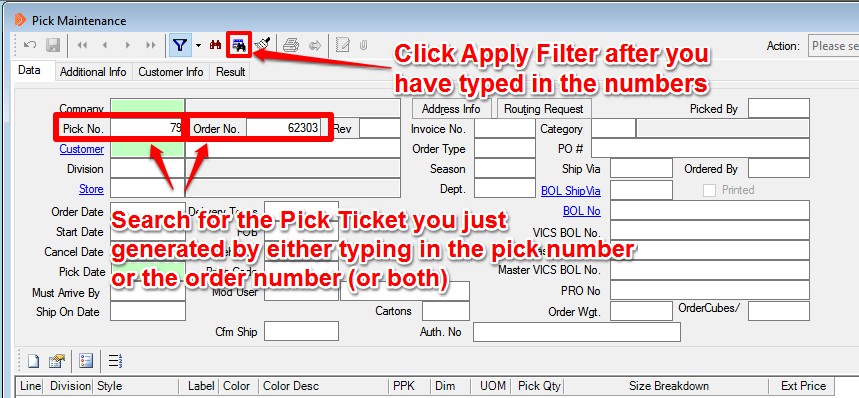
The Pick Ticket for the order will appear, if it exists.
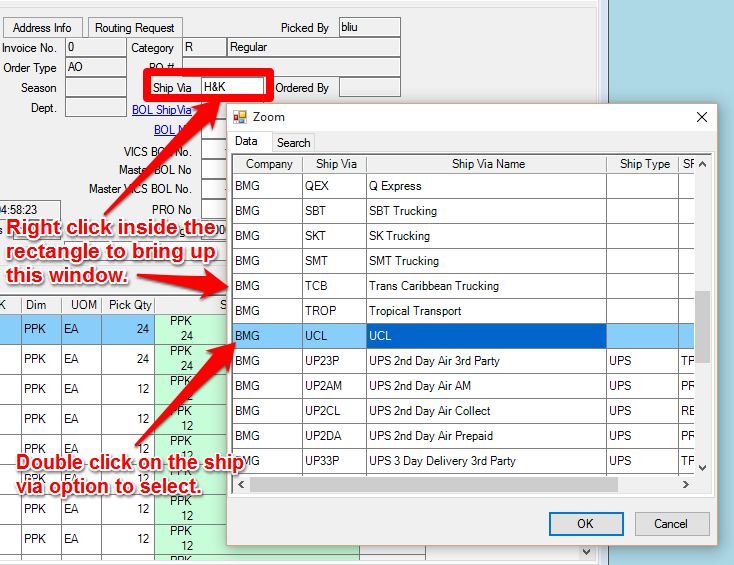
Adjust Ship Via
If you need to adjust the Ship Via for the order, right click on the rectangle next to Ship Via.
Adjust Delivery Terms
If you need to change the Delivery Terms (which is how the customer will pay for shipping), right click on the rectangle next to Delivery Terms.
If you need to change the Delivery Terms (which is how the customer will pay for shipping), right click on the rectangle next to Delivery Terms.
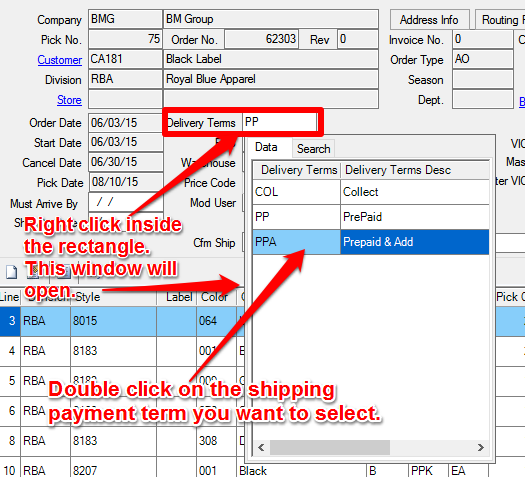
Here are the meanings of the Delivery Term choices:
- COL - Collect, means we will pay for shipping.
- PP - PrePaid, means the customer pays for shipping but the fee will not show up on the invoice.
- PPA - Prepaid & Add, means the customer pays for shipping and the fee will show up on the invoice. This is the most common.
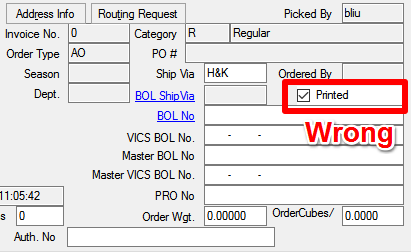
The Printed Checkbox Should not be Marked
In order for the Warehouse to print the Pick Ticket, make sure the Printed checkbox is unmarked.
Otherwise Simparel will prohibit them from printing the ticket, to avoid duplicates.
Otherwise Simparel will prohibit them from printing the ticket, to avoid duplicates.

|
|
Save the Pick Ticket
Click Save at the top of the window.
Click Save at the top of the window.
Next Steps
Next we have to print the Pick Ticket. To learn the steps for Printing the Pick Ticket, click on the button below: