How to Enter a Sales Order
Watch the video below for instructions on how to enter a sales order. You may also scroll down the page to see written instructions that cover the same steps.
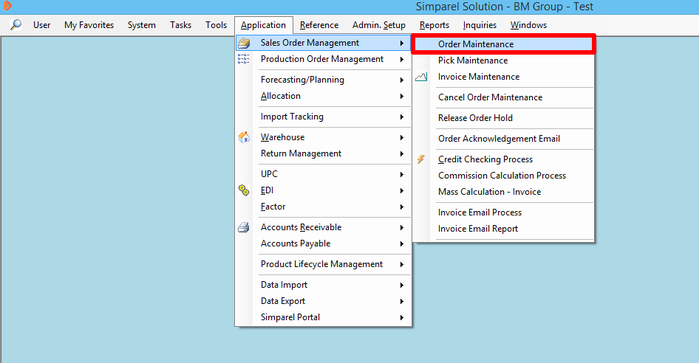
Open the Order Maintenance Application
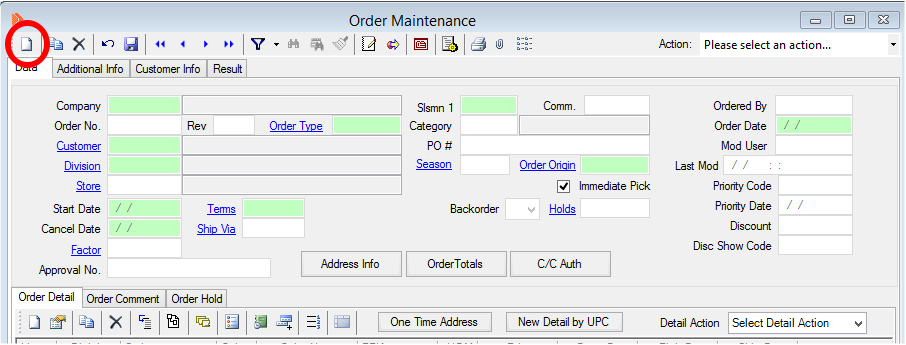
Click on New Order
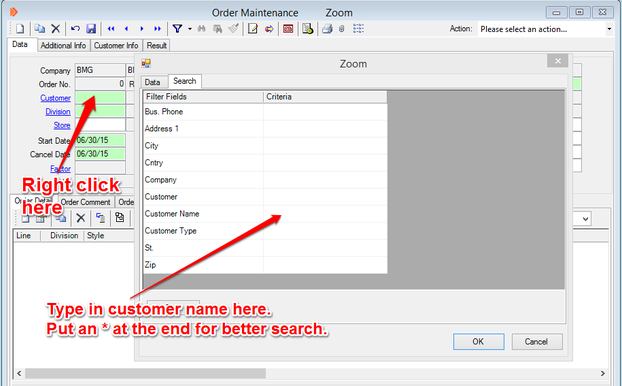
Fill in the Customer Name
Right click on the rectangle next to Customer.
A window will appear. Search for the customer by typing in the name in the field next to Customer Name.
Click Find to see the search results.
Right click on the rectangle next to Customer.
A window will appear. Search for the customer by typing in the name in the field next to Customer Name.
Click Find to see the search results.
|
Type * if you are unsure of the exact name.
Example:
|
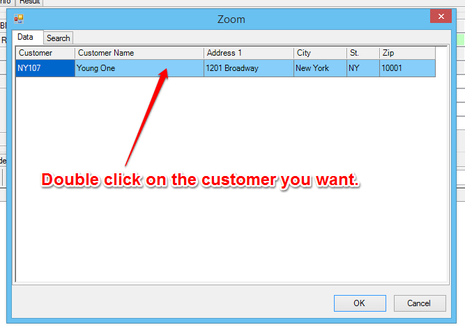
Click on the Customer you want
What if the customer is not showing up?
You probably have a new customer. You will have to enter the customer's information into the system first. To learn how to do so, click on the button below:
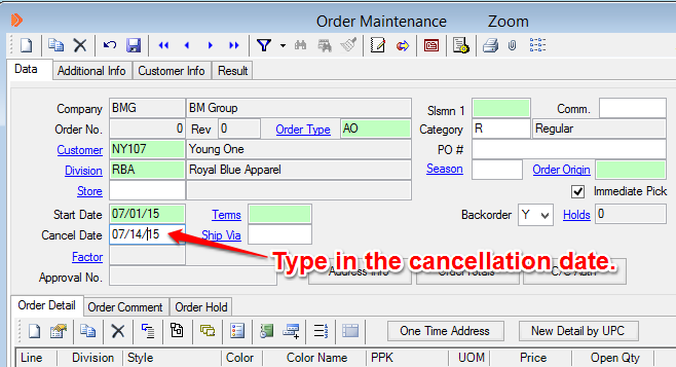
Type in the Cancel Date
Fill in the Payment Terms
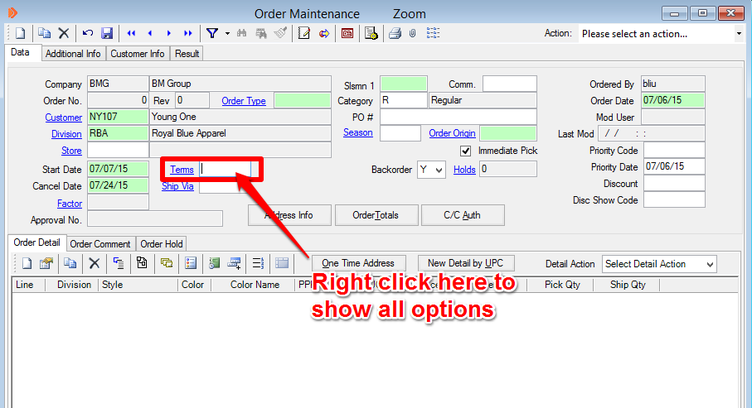
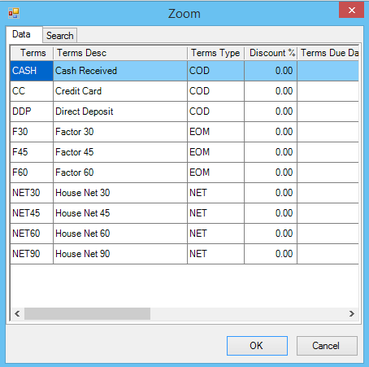
A window with Payment terms will appear.
Double click on the terms for the order.
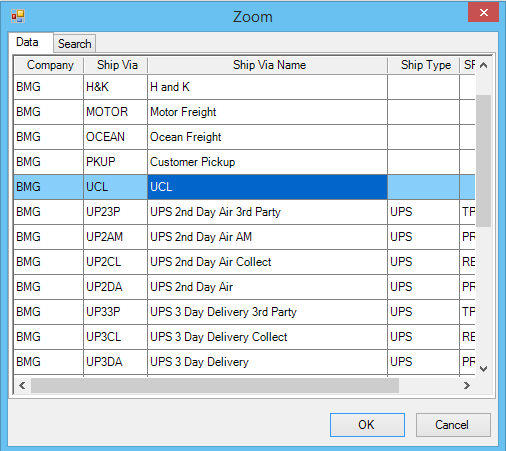
Fill in the Ship Via
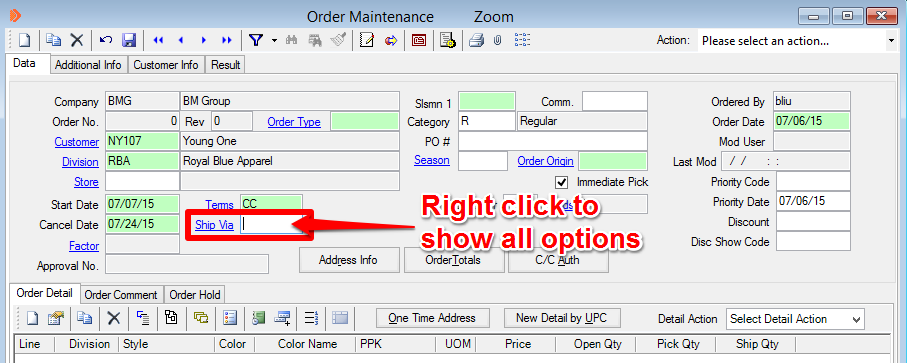
A window with Ship Via options will appear.
Double click on the Ship Via option for this order.
Select the Sales Rep for this Order
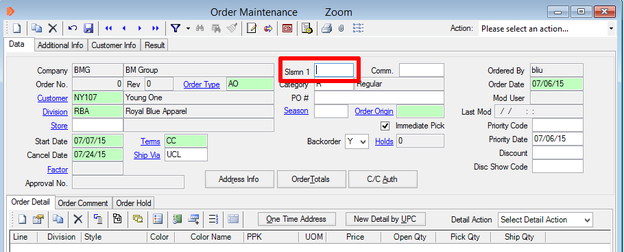
Who should I put for Salesmen?
If you made the order then put your user name. If you are a customer service associate and you took the order, put your username even if the customer belongs to a particular salesmen's territory.
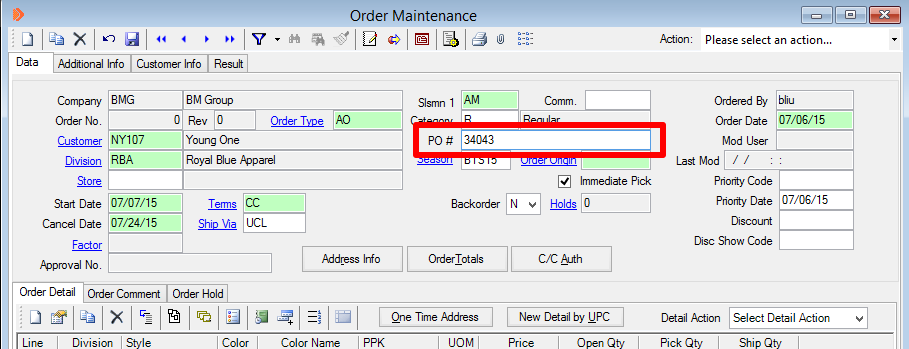
Type in Customer PO Number if you have one
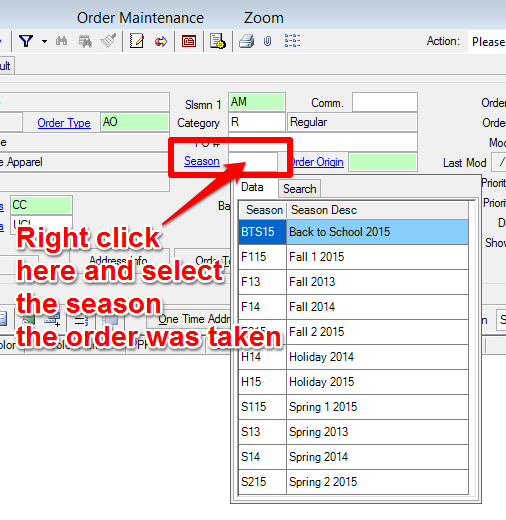
Select the season in which the order was taken
If you don't see your season, you may have to add it first. To learn how to do that, click the button:
If you don't see your season, you may have to add it first. To learn how to do that, click the button:
If the season exists, or you have just created it, then right click on the rectangle next to Season.
Select the season you want from the window that appears.
Select the Order Origin
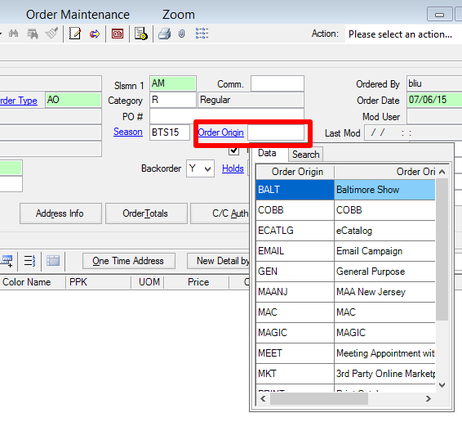
|
How do I know which Order Origin to Choose?
Please ask the customer how he or she thought of placing an order with us. You have to select the reason the customer made the order. It could be that the customer went to a tradeshow to place an order, or it could be that they saw an email from us and wanted to place an order. If they are just placing an order for no specific reason, then put General Purpose. |
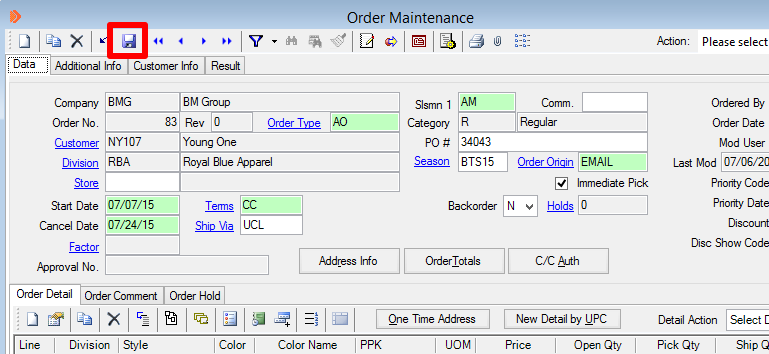
Save the Order
Note the Order Number is auto-generated by the system. Record it to help you refer to it more easily later.
Note the Order Number is auto-generated by the system. Record it to help you refer to it more easily later.

Click on New Order Detail
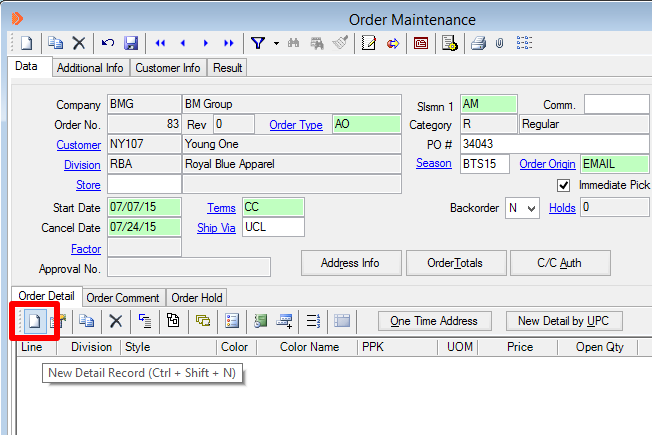
The Order Detail window will appear.
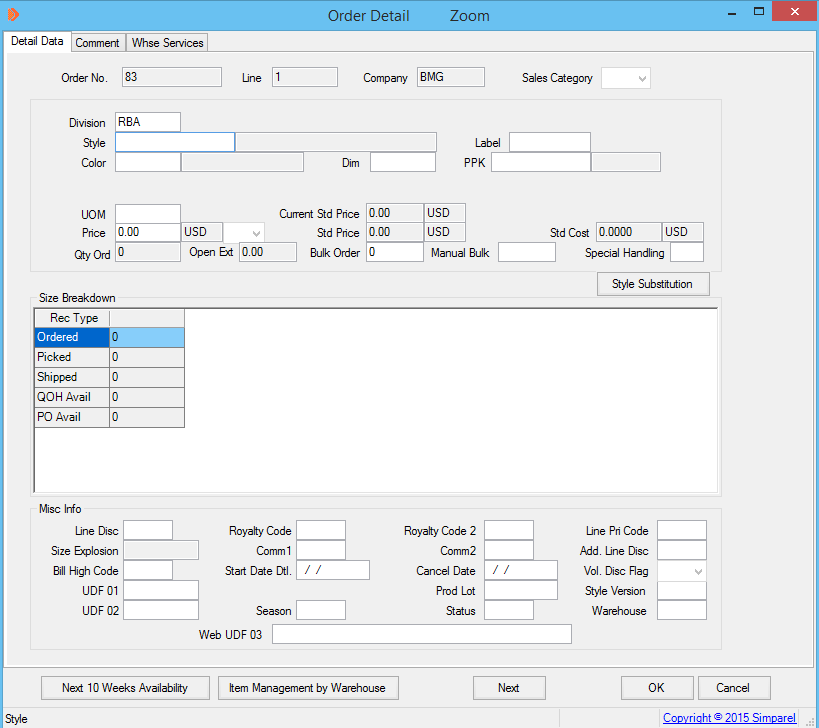
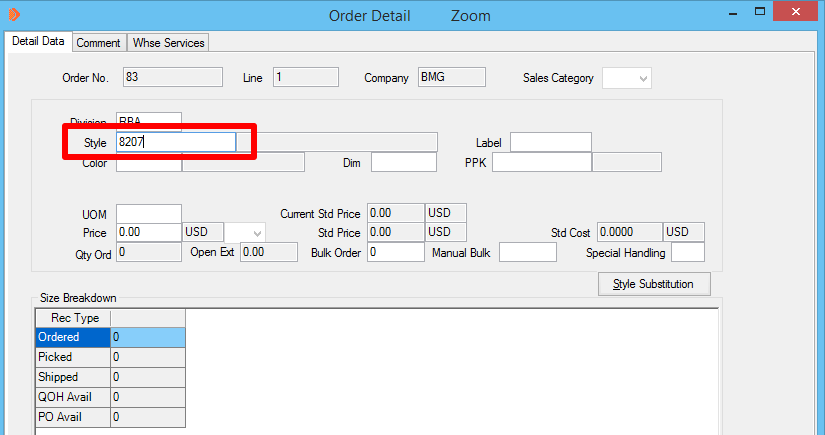
Enter the Style Number
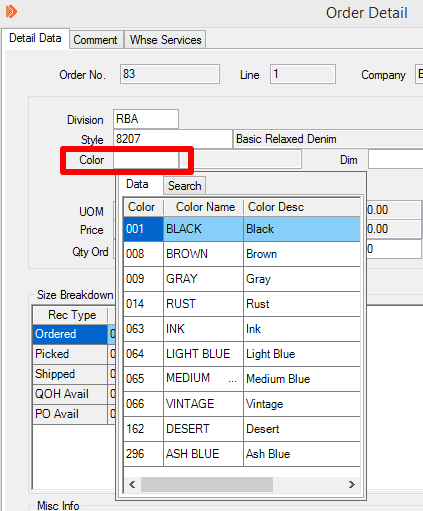
Choose the Color
If you do not see the color you want, you may have to add it first. To learn how to add a color, click on the button:
If you do not see the color you want, you may have to add it first. To learn how to add a color, click on the button:
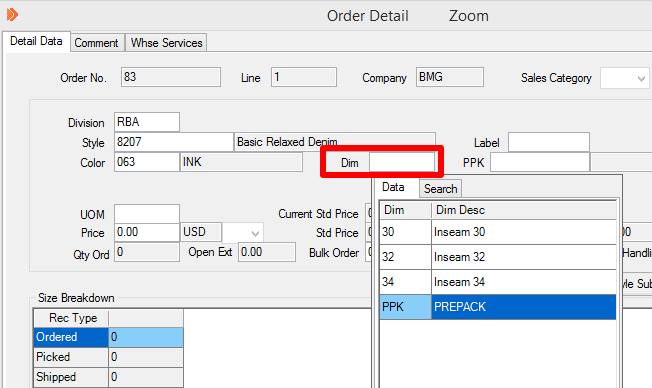
Does the style have an Inseam?
If yes, then set the Dim to PPK (you can also type PPK). Otherwise, leave it blank.
If yes, then set the Dim to PPK (you can also type PPK). Otherwise, leave it blank.
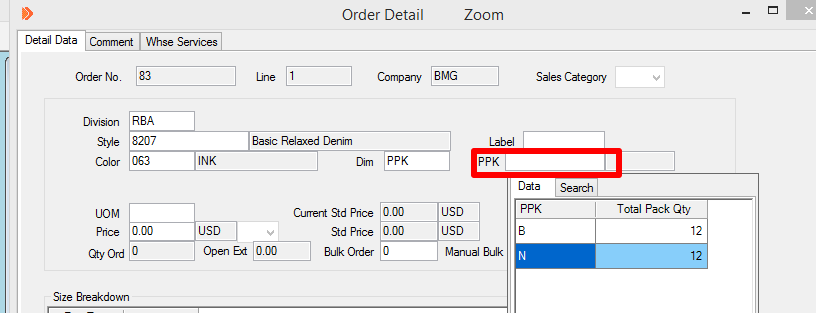
Select the Pre-Pack (PPK)
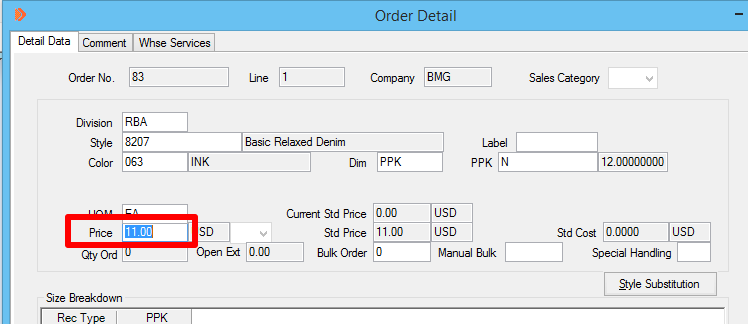
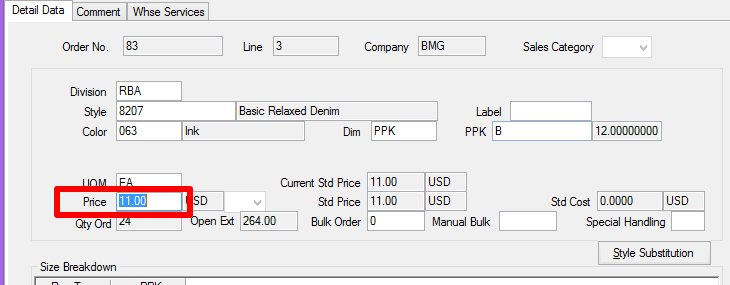
Set the Price for this order item
Enter the Order Quantity amount in pieces, not cartons
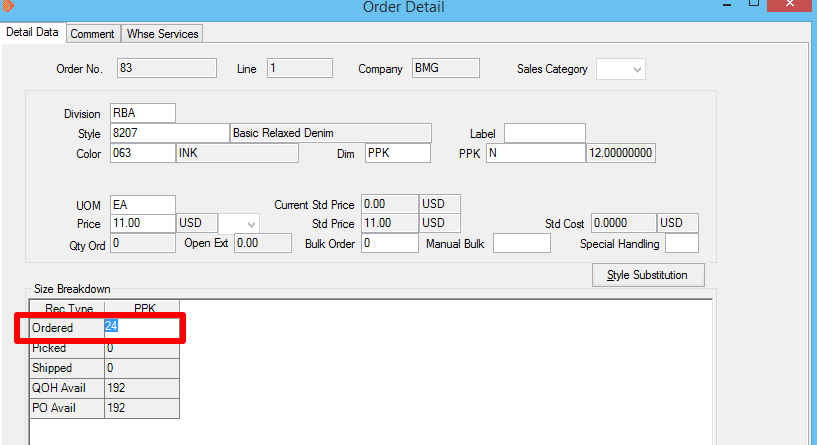
Click OK to confirm this order line

If you get the following error message:
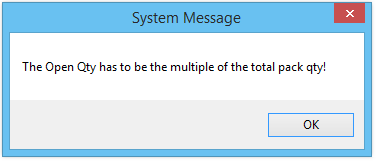
that means that the quantity you entered for this order line is not a multiple of the prepack quantity.
For example, the prepack quantity for PPK B is 12 and you may have entered 15.
To resolve this:
- Click OK to close the System Message
- Correct the order line quantity
- Click OK
Enter another order line item
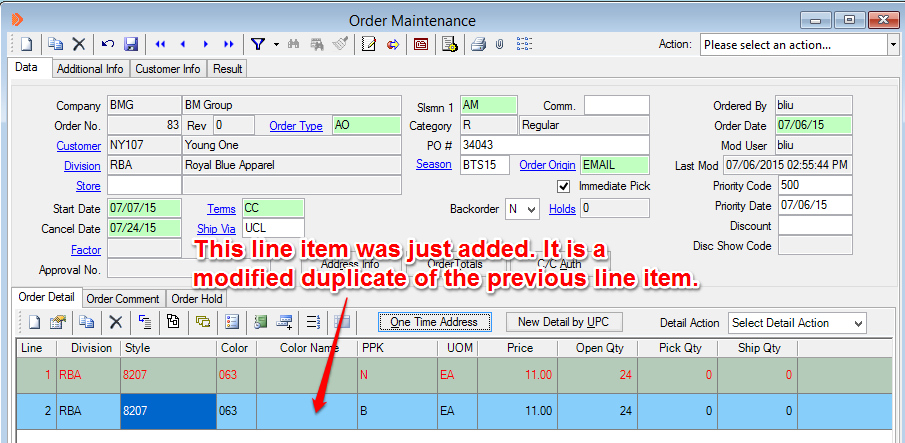
To save time and effort, if the next line item is very similar to the one just entered, click on the record and then click on Copy Record.
To save time and effort, if the next line item is very similar to the one just entered, click on the record and then click on Copy Record.
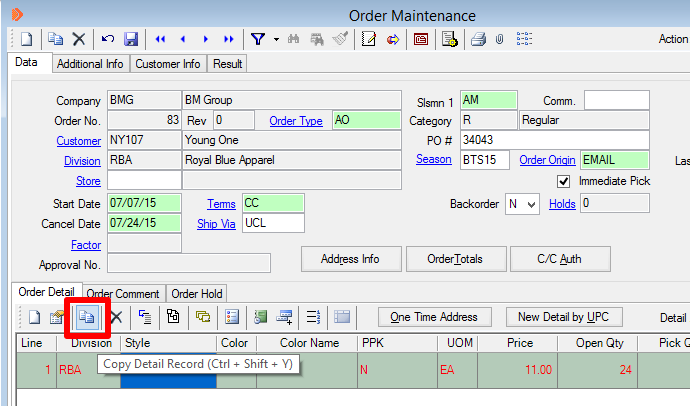
This creates a duplicate of an existing record and opens a new Order Detail window.
Make the changes that are specific to the new line item.
For example, the line item we created earlier is for pack N.
If the new copied line item has pack B, then make that change.
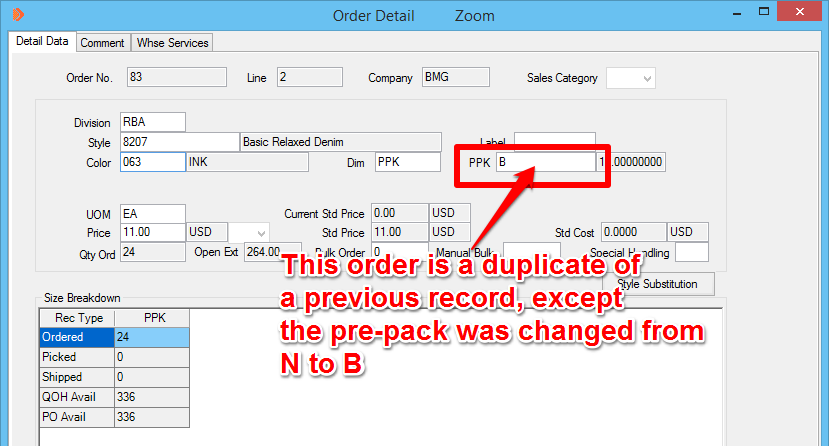
The Price always resets to the default. Make sure to change it for the order.
When you are done making changes, click OK at the bottom of the window.
The new line item will be added to the Order Maintenance window.
Repeat adding or copying line items for the order until complete
Remember to save your changes at the end.
Remember to save your changes at the end.
Next Steps
If this is a Factor Order, then it is time to get the Factor Credit Approval. If you are responsible for this, click on the button below to learn the steps for Credit Request:
If this is a Factor Order, then it is time to get the Factor Credit Approval. If you are responsible for this, click on the button below to learn the steps for Credit Request:
If this order is ready for Pick Tickets, then learn about how to generate Pick Tickets by clicking on this button:
If you are a sales representative, then congratulations, you are done!
END OF PROCESS